
Manage access
Access in Querri is not one decision. It is four, and they stack. This page walks through all of them in the order you meet them, and shows where each one is set.
Read the transcript
Four ways in
In Querri, you put the right data in the right hands. There are three ways to do that… and a fourth that decides what people see once they are in. Together, they let you open your data to the people who need it, and keep control of it.
The workspace
Start with the workspace. It is a room. A team, a body of work, one place… and everything saved in it belongs to the people who work there. That is the default answer when someone asks who can see this, and most of the time it is the only answer you need.
Share one thing
But work does not always fit the room. One person outside it needs one thing, so you hand them just that. And when a whole department needs your data, you still do not have to hand it over raw… or lose control of it. In Sales, you build a view. Cleaned, filtered, joined, shaped to the question Finance actually asks. Then you share that view with Finance, and nothing else. It stays in Sales. Nothing is moved, nothing is copied… and you decide exactly how much they can see.
Public links
And sometimes there is no account at all. A client. Someone outside the company entirely. A public link reaches them… and it shows whatever you can see, because there is nobody signed in to filter for.
Filter the rows
Underneath all three sits one more question. Not what someone can open… but what is inside it. An access policy filters the rows, person by person. Everything else you have seen adds access. A policy only ever takes it away.
How it fits your organization
Now notice what you did not have to do. You did not reorganize anything. Sales still owns what Sales builds. Finance still owns what Finance builds. Each team lends its work to the teams that need it, without giving it up… and one set of rules covers all of them. Querri fits the shape your company already has.
Where to do each one
So here is each of the four. In Settings, People is where you invite someone and give them a role. Roles set what people can do. Workspaces set what they can reach. One dialog does both. On any item, Share shows every answer at once. The workspace it lives in. Any workspace you have lent it to. Who has it by name. And whether a link exists. And on a dashboard or a project, that same box takes a person… or a whole team. Name the workspace, and everyone in it is in. A link can carry a password, and unless you say otherwise, it expires in thirty days… and if a policy filters you, Querri says so before you create it. And in Security, a policy is one column and the values a person is allowed. Region… east. Assign it to someone, and every table with that column comes back filtered, wherever they open it. A room for the team. An item for a person. A link for the outside… and the right rows for each of them. Whatever anyone asks you about access, the answer is one of those four…
The four ways in
Section titled “The four ways in”| Way in | What it decides | Granularity | Who sets it |
|---|---|---|---|
| Workspace membership | Which work and data a group shares | Everything saved in that workspace, plus anything shared with it | Organization admins |
| Direct sharing | Who can open one project, dashboard, connector or Library item | One item, one person or one workspace | Usually the item’s owner |
| Public link | Anyone with the URL can open it | One item, anyone | The item’s owner |
| Access policy | Which rows of a table a person sees | One person, one column of one table | Organization admins |
The first three decide whether someone can open something. The fourth decides what they see once they are in. You need both when different people should see different slices of the same dashboard.
They stack, and only policies take away
Section titled “They stack, and only policies take away”Workspace membership, sharing and links each add access. An access policy only ever removes rows. Nothing in Querri grants rows back: a person’s policies are applied on top of whatever they were allowed to open.
That has one consequence worth holding onto before you build anything: until a person is assigned a policy, they see every row of everything they can open.
1. Add someone to your organization
Section titled “1. Add someone to your organization”Open Settings from your avatar menu, then People under Organization. Admins only.
- Click Invite Users.
- Fill in Email, First name, Last name and Role for each person. + Add another adds a row, or paste a list of addresses into Email and it splits into one row per person.
- Click Send Invites.
- Email: one person per row, or paste a list.
- Role: starts at Guest for every row.
- + Add another: another person.
- Send Invites: send them all.
Check the roles before you send. Every row starts at Guest, including every row from a pasted list, and a Guest can only view. Creators and Admins use a seat on your plan; Guests do not.
| Organization role | What it means |
|---|---|
| Admin | Runs Settings, including People, Workspaces and Security |
| Creator | Builds and edits |
| Guest | Views only |
Changes on People save the moment you make them. There is no Save button and no confirmation. See People.
2. Put them in a workspace
Section titled “2. Put them in a workspace”A workspace is where a team’s work and data live together, so members see what is saved there without anyone sharing item by item.
Everyone can reach their own private workspace and the organization’s default workspace without being added. Every other workspace is invisible until someone adds them to it.
Admins create workspaces in Settings › Organization › Workspaces, then click Manage on one and open its Members tab to add people.
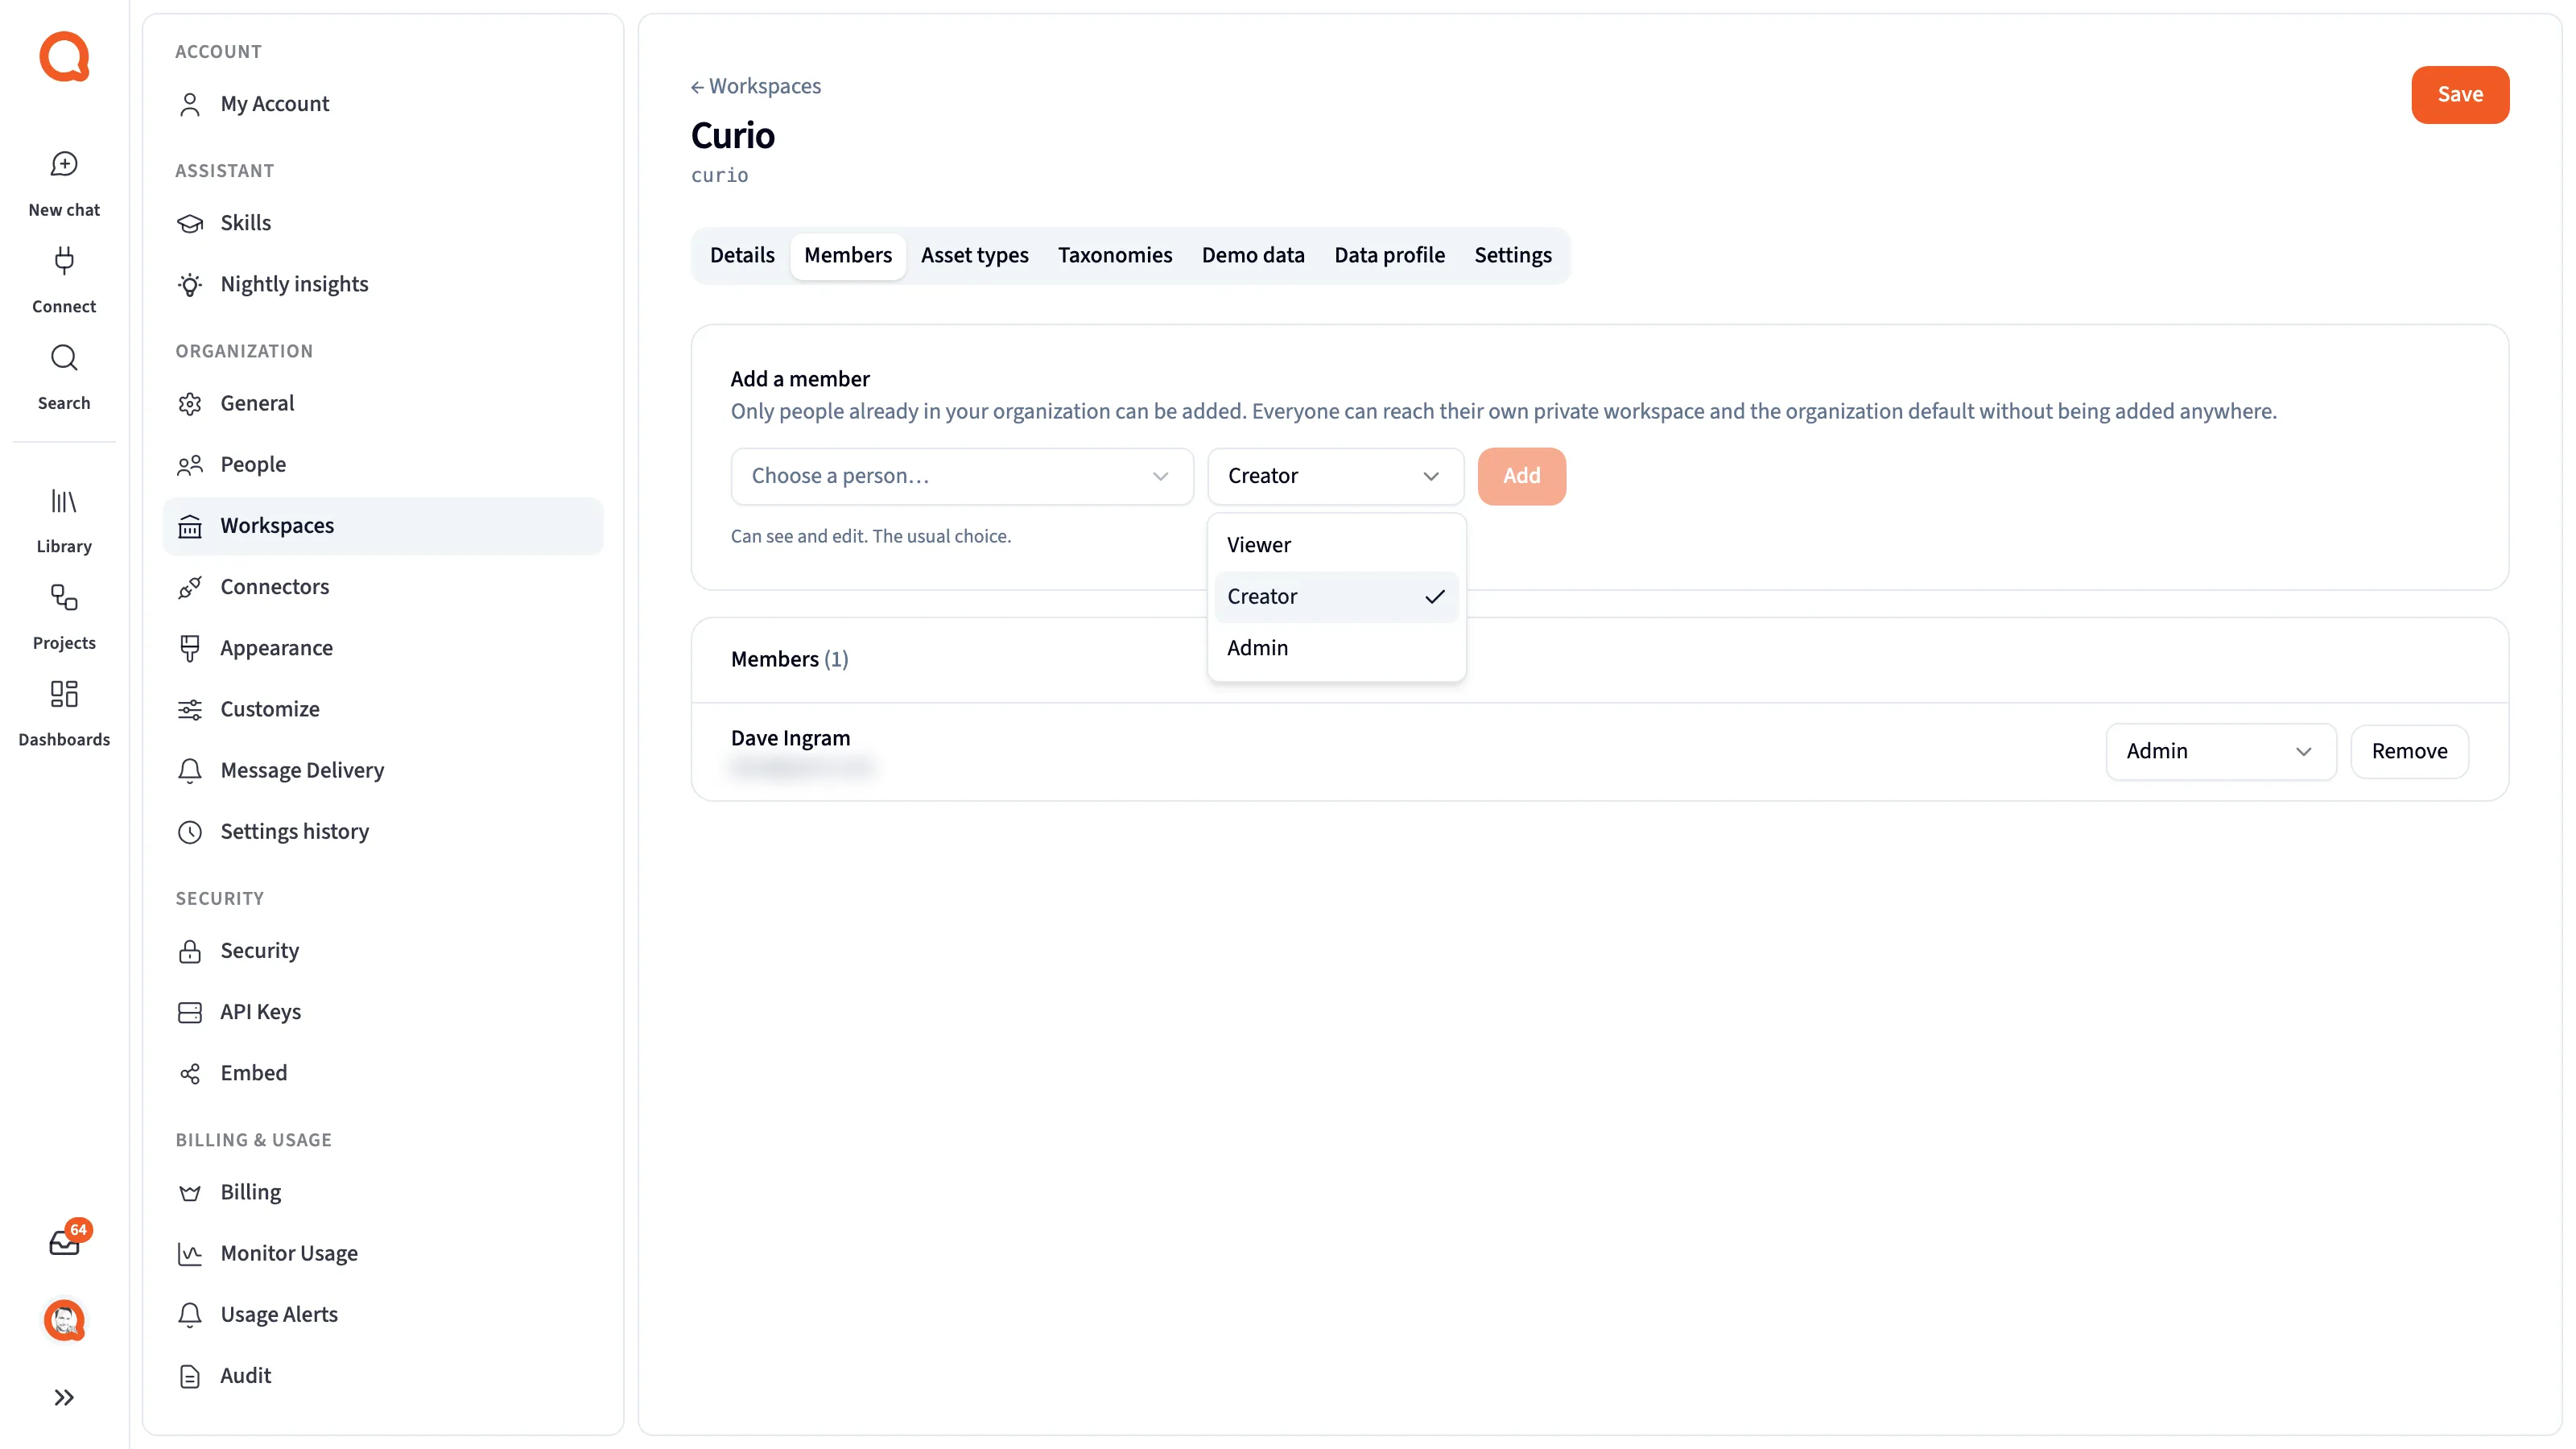
- Add a member: anyone already in your organization.
- The role select: the workspace role.
- A member row: who is in, and as what.
| Workspace role | What the screen says |
|---|---|
| Viewer | ”Can see this workspace’s content.” |
| Creator | ”Can see and edit. The usual choice.” |
| Admin | ”Can also manage the workspace and its members.” |
Creator is the default when you add someone. A workspace admin can delete or share anything saved in that workspace, even things they did not make.
Workspace roles are separate from organization roles. Someone can be a Guest in the organization and a Creator in one workspace. See Workspaces and Workspaces and privacy.
3. Share one item, with a person or a whole workspace
Section titled “3. Share one item, with a person or a whole workspace”Sharing is for the item that does not belong where it is saved.
| Item | Where | Roles you can give |
|---|---|---|
| Project | The Share icon in the project’s chat header | Viewer, Editor, Owner |
| Dashboard | Share in the dashboard header | Viewer, Editor, Owner |
| Connector | The connector’s Sharing tab | Viewer, Editor, Owner, View all sources |
| Library file or table | Share… in the item’s row menu | Viewer, Editor |
Only an owner can add people to a project. Everyone else sees “Only owners can share this project.” On a dashboard, editors can see the add-people controls, but only the owner or an admin can actually add or remove someone.
Share with a workspace
Section titled “Share with a workspace”The same dialogs take a workspace as well as a person. Give a workspace Viewer on a dashboard and everyone who can enter that workspace can open it, including whoever joins later. You grant it once, and membership keeps it current.
The item does not move. It stays where it is saved, owned by the team that owns it, and it keeps the workspace it already lives in. Sharing to a workspace lends access; it does not hand the item over.
This is what lets one team prepare something for another. Build a view in your own workspace, filtered and cleaned for the question the other team asks, then share just that view with their workspace. They get the prepared view. They do not get the raw tables behind it.
Two limits are worth knowing:
- You can only share with a workspace you can enter yourself. Workspaces you cannot reach are not offered.
- You cannot share an item with your own private workspace, because nobody else is in it. Share with a person instead.
- View all sources on a connector is a per-person grant and cannot be given to a workspace.
There is still no way to share something with the whole organization in one step. To make something visible to everyone, keep it in the organization’s default workspace, which everyone can reach.
See Sharing for each dialog in full.
4. Publish a public link
Section titled “4. Publish a public link”A public link opens the item to anyone who has the URL. Projects, dashboards and Library items can each have one.
A link carries your access, not the visitor’s. There is nobody signed in to resolve policies against, so the data comes back filtered by your access policies. When a policy filters you, the link dialog says so before you create the link:
Row-level security enabled. Anyone with this link will see your data, filtered by your security policies. Use a password and expiration for added protection. For per-user access control, use direct invite instead.
That is the choice in one line. A link is for a result you are happy for the recipients to see as you see it. When people need their own filtered view, share with them directly, which applies each viewer’s own policies.
The warning is about you, not about the dashboard. It is worked out for whoever is looking (dashboard/rls_shadow.py computes it per viewer), so an admin with no policy of their own sees no warning, and the link they make still carries their unfiltered view.
Both dialogs offer an expiry and a password. Project and dashboard links expire in 30 days by default. Dashboard links are also listed in search engines by default, which switches off when you set a password.
Public link visitors do not get the dashboard assistant.
5. Filter the rows each person sees
Section titled “5. Filter the rows each person sees”An access policy is a column, a list of allowed values, and the people it applies to. A policy on region allowing SE means anyone assigned to it sees only rows where region is SE.
Admins create them in Settings › Security › Access Policies. Assign people by clicking the number in a policy’s Users column; picking someone assigns them straight away, with no save step.
Policies combine in two directions:
- Same column, values add up.
regionSEplusregionNEshows both regions. - Different columns, both must match.
regionSEplusdepartmentSalesshows only rows that are both.
One policy takes one column. To filter on two, make two policies and assign the same people to both.
- The user picker: picking someone assigns them on the spot.
- The assigned list: who this policy applies to.
- ✕: removes them on the spot.
Row-level security in full, including Auto and Explicit sources and what it does to dashboards, links and API keys, is on Access Policies.
Check what someone actually sees
Section titled “Check what someone actually sees”Do not assume. Preview Access, at the top of the Access Policies tab, shows the filter a person would get on a source. Pick a User and a Source and click Resolve Access.
It reports either full access, when they have no policies or none apply to that source, or the Generated WHERE clause: that Querri adds to their queries. It shows the filter, not the rows.
- User: the person to check.
- Source: the source to check.
- Resolve Access: show their filter.
- The WHERE clause: what gets added to their queries.
The other default to check
Section titled “The other default to check”An empty Allowed Domains list means any website can embed Querri. Add your own sites under Embed in Settings. See Embed Domains.
Where control stays with admins
Section titled “Where control stays with admins”Most of the rules above are set centrally. Organization admins set everyone’s organization role, create workspaces and choose their members, create access policies and assign people to them, and create and revoke API keys. A team cannot set up its own policies.
Workspace admins get a smaller share: their own workspace, its members, and anything saved in it.
Ownership of data sits with whoever brought it in. Whoever connects a source owns that connector and decides who else can use it, and only owners can set its sync Schedule. Files you upload land in the workspace you are working in, or in Private if you cannot add to that workspace, and a message tells you so.
Organization admins have one more tool: they can grant anyone, including themselves, access to any project, dashboard, source or connector. Every grant and removal is written to the audit log.
Next steps
Section titled “Next steps”- Sharing: every share dialog, field by field
- Access Policies: row-level security in full
- Workspaces: roles and membership
- Dashboard Security: what each dashboard viewer sees
- Audit Log: what gets recorded