
Workspaces
Esta página aún no está disponible en español. Se muestra la versión en inglés.
A workspace decides who sees what. The page puts it this way: “A workspace is a place where a group of people share a set of data and files. Create one per team or per project, decide who can see it, then set what can live there.”
Who can see this: admins only. Open it from Organization › Workspaces in Settings, or Manage workspaces in the workspace switcher.
Leer la transcripción
Why teams need workspaces
Marketing needs campaign data. Finance needs the numbers. Share it all file by file, and it gets messy fast. In Querri, a workspace is a place where a group of people share a set of data and files. Only its members can open it, so each team keeps its own data together.
Create a workspace for each team
As an organization admin, open Settings, then Workspaces, and create one per team or project. Type a name, and Querri fills in the URL name for you. Then click Create workspace. You become its admin, and it stays private until you add people.
Choose who can see a workspace
Next, decide who can see it. Click Manage, then Members, and add people from your organization. Each person gets a role. A Viewer can see the workspace’s content, a Creator can also edit, and an Admin can manage the workspace and its members.
Switch workspaces from the home screen
Then everyone picks where to work, right from the home screen. Pick a team’s workspace, and Querri answers from what’s in it and saves anything it creates there. Leave it on Everything to cover every workspace you can see. New work then goes to your private space, which only you can open. Give every team its own space.
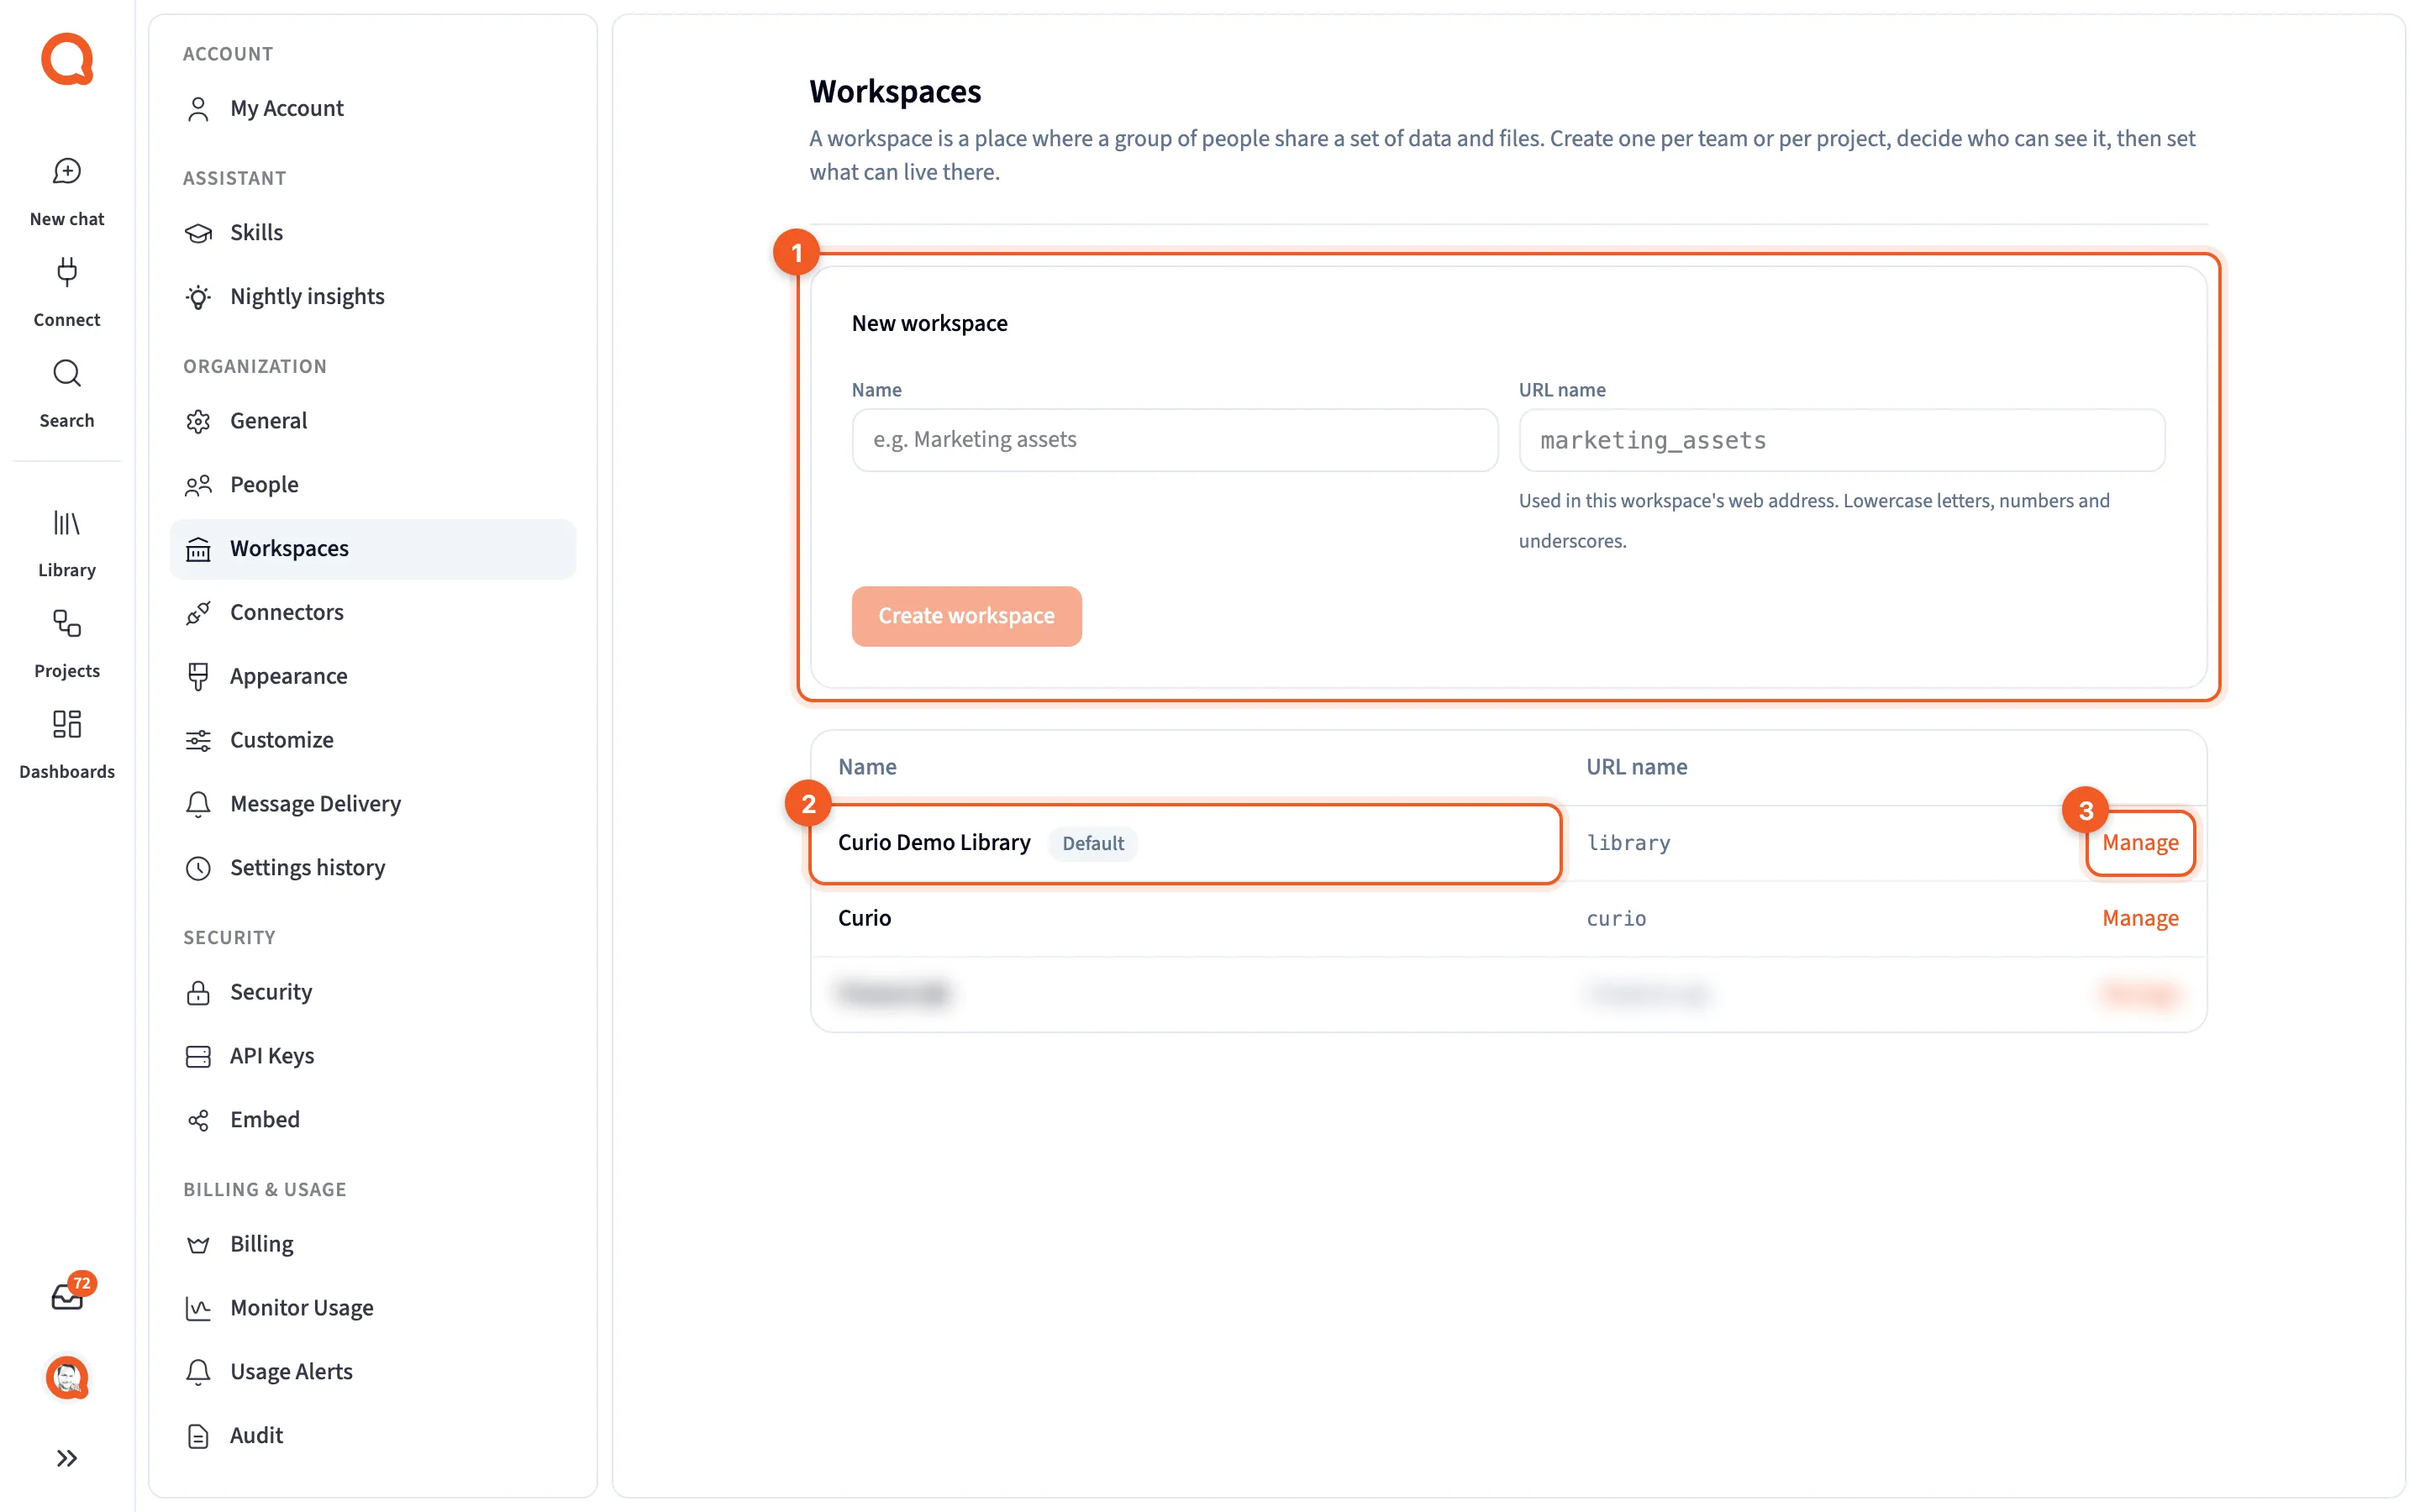
- New workspace: create a workspace.
- The default workspace, marked Default.
- Manage: open a workspace’s settings.
The workspace list
Section titled “The workspace list”The table shows each workspace’s Name and URL name, and the organization’s default carries a Default badge. Everyone can reach their own private workspace and the default without being added to either.
To create one, type a Name under New workspace. URL name fills in from the name, using lowercase letters, numbers and _, and becomes part of the workspace’s web address. Click Create workspace.
Querri then reminds you that you’re still in your current workspace, so anything you upload, connect or install goes there, not into the new one. Choose Stay here and configure it, or the Switch to button with the new workspace’s name.
A workspace’s settings
Section titled “A workspace’s settings”Click Manage on a row. The top of the page has a ← Workspaces link, the workspace’s name and URL name, and Save. The tabs are Details, Members, Asset types, Taxonomies, Demo data, Data profile and Settings.
Save covers the Details and Settings tabs. Most controls on the other tabs act as soon as you use them.

- The tabs, from Details to Settings.
- Save.
Asset types, Taxonomies and Settings set up the workspace’s file library, such as which kinds of file it accepts and how long files are kept.
Details
Section titled “Details”Name, Description and URL name. The URL name has to be unique in your organization, so a clash gets a suffix added. Changing it changes the workspace’s address, and links that use the old name stop working.
Danger zone holds Delete workspace, and the default workspace doesn’t have one. The page warns: “Deleting a workspace removes its asset-type assignments. This cannot be undone.” Your browser asks you to confirm.
Deleting removes the workspace itself: its name, URL name, settings and asset-type assignments. It doesn’t delete the projects, dashboards, files or connectors homed there, and it doesn’t move them to another workspace.
Members
Section titled “Members”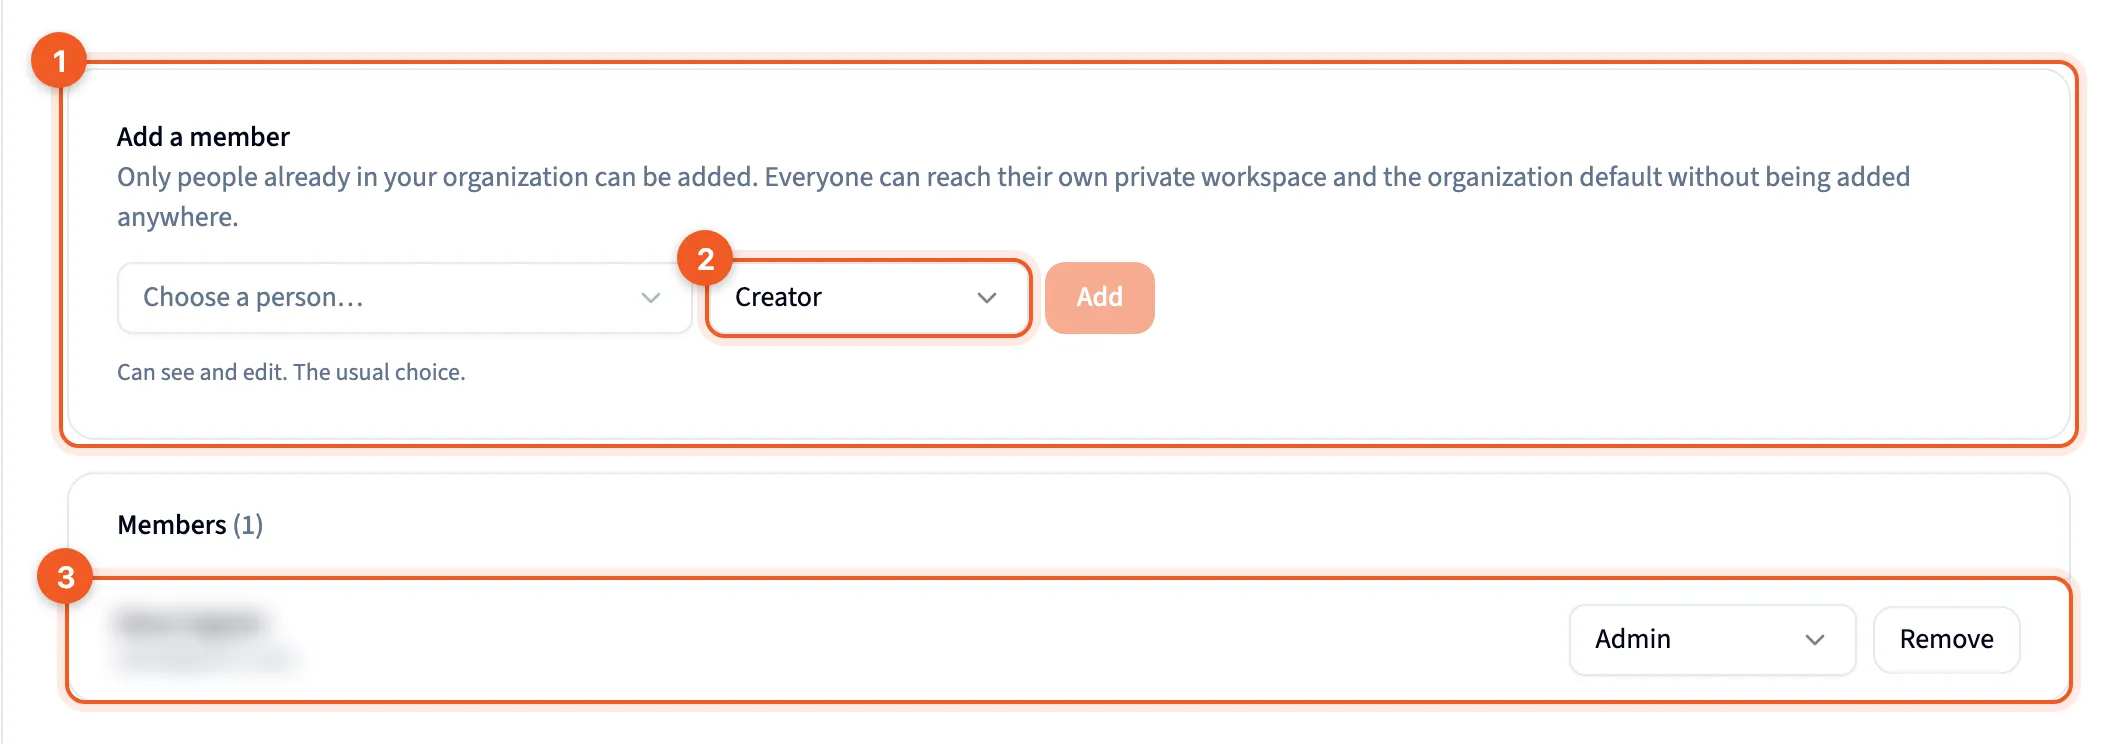
- Add a member: add someone who’s already in your organization.
- The role select: Viewer, Creator or Admin.
- A member’s row, with their role and Remove.
Only people already in your organization can be added. To bring in someone new, invite them on People first.
Under Add a member, pick someone from Choose a person…, pick a workspace role (it starts at Creator) and click Add. The hint under the menu says what the role allows:
| Role | Hint on the screen |
|---|---|
| Viewer | Can see this workspace’s content. |
| Creator | Can see and edit. The usual choice. |
| Admin | Can also manage the workspace and its members. |
In the members list, changing someone’s role saves at once, with no confirmation. Remove asks your browser to confirm. If someone has left the organization, their row says so, so you can clear them out.
Until you add anyone, the tab tells you only you can see the workspace.
What the roles allow
Section titled “What the roles allow”- Viewers see everything homed in the workspace, read-only.
- Creators can also create and edit.
- Admins can also manage the workspace, its members and its settings. That includes deleting, transferring or sharing any item homed there, even one somebody else owns.
Someone without Creator or Admin in a workspace can still edit an item there if it’s been shared with them as an Editor. A single project or dashboard has its own share levels: Viewer, Editor and owner. See Sharing.
Workspace roles are separate from the organization roles on People, so being a workspace Admin doesn’t open the admin pages in Settings. See Workspaces and privacy.
Demo data
Section titled “Demo data”This tab installs Curio, Querri’s sample company, into the workspace you’re managing. Curio is a made-up paper-products manufacturer whose invented data holds together across all its systems.
Installing it adds connected systems and their tables, plus collections, questions and KPIs to explore them with.
- Before it’s installed, choose Standard (the recommended size) or Small (installs faster, but charts look sparse), then click Install demo data.
- Installing or removing takes a few minutes, and keeps going if you leave the page.
- Once it’s in, you’ll see “Demo data is installed in this workspace.”, counts of what’s there, and Remove demo data.
- If a run fails, the tab says “The last run didn’t finish.” and shows the error with Try again.
Demo data can also go missing later, when something outside this tab removes part of it, such as resetting onboarding, which wipes the Library for the whole organization. The tab then says “Some of the demo data is no longer in this workspace.” and how much of it is still there.
- Repair demo data runs the install again, at the size it was first installed. It puts the missing pieces back and leaves everything else alone.
- Remove demo data asks your browser to confirm, then deletes the demo connectors, sources and collections it installed. Nothing else in the workspace is touched.
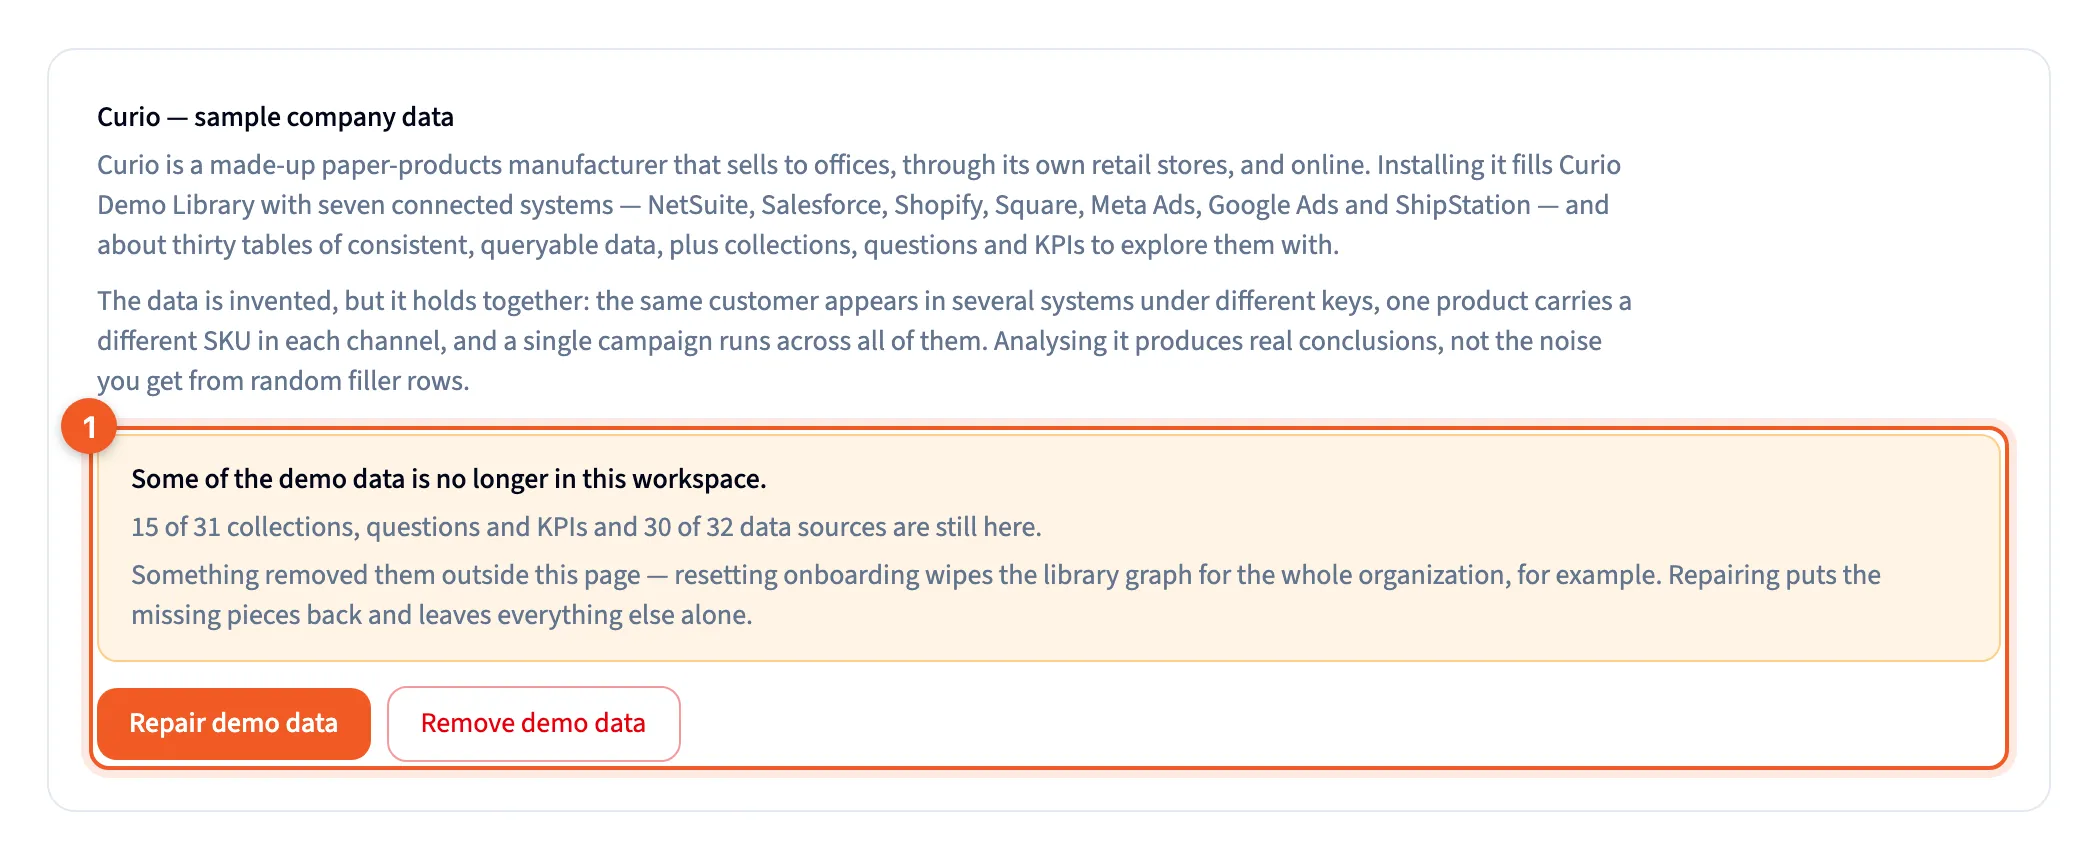
- What’s missing, with Repair demo data and Remove demo data.
Data profile
Section titled “Data profile”In the tab’s words, “Profiling measures each table once: row count, keys and grain, duplicates, blanks and top values.” That lets the assistant answer data-quality questions and build views without scanning the data again every time.
The tab shows the last run, including any sources it couldn’t measure. Re-profile all data measures again once your browser confirms, and Re-measure tables that are already current includes tables that look up to date. Re-profile after the profiler improves, or when a table changed but its profile still looks current.
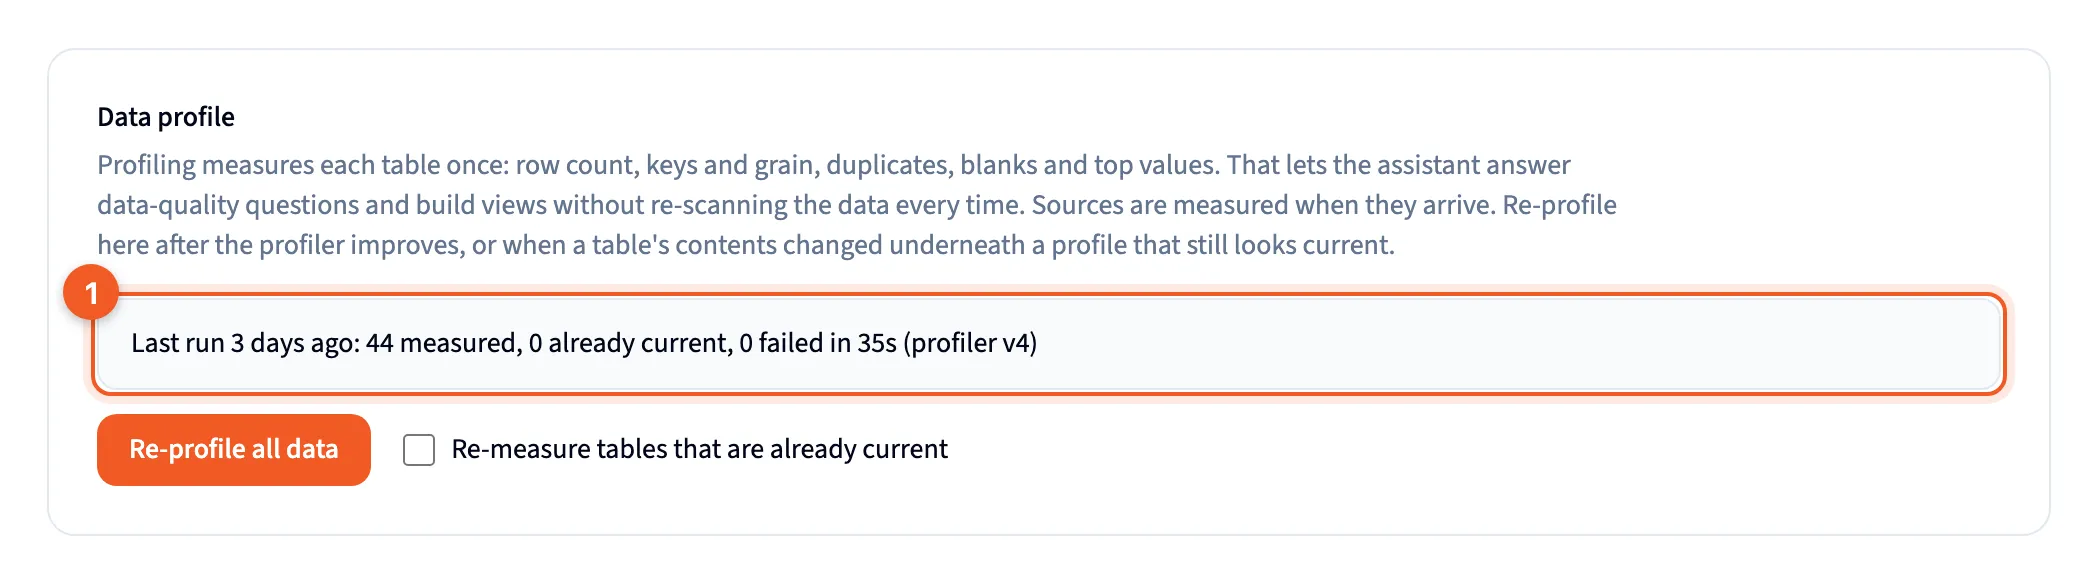
- The last run: how many tables were measured, already current or failed.