
People
People lists everyone in your organization. From here an admin invites people, sets each person’s organization role, removes people, and caps how many credits one person can use in a month.
Who can see this: admins only.
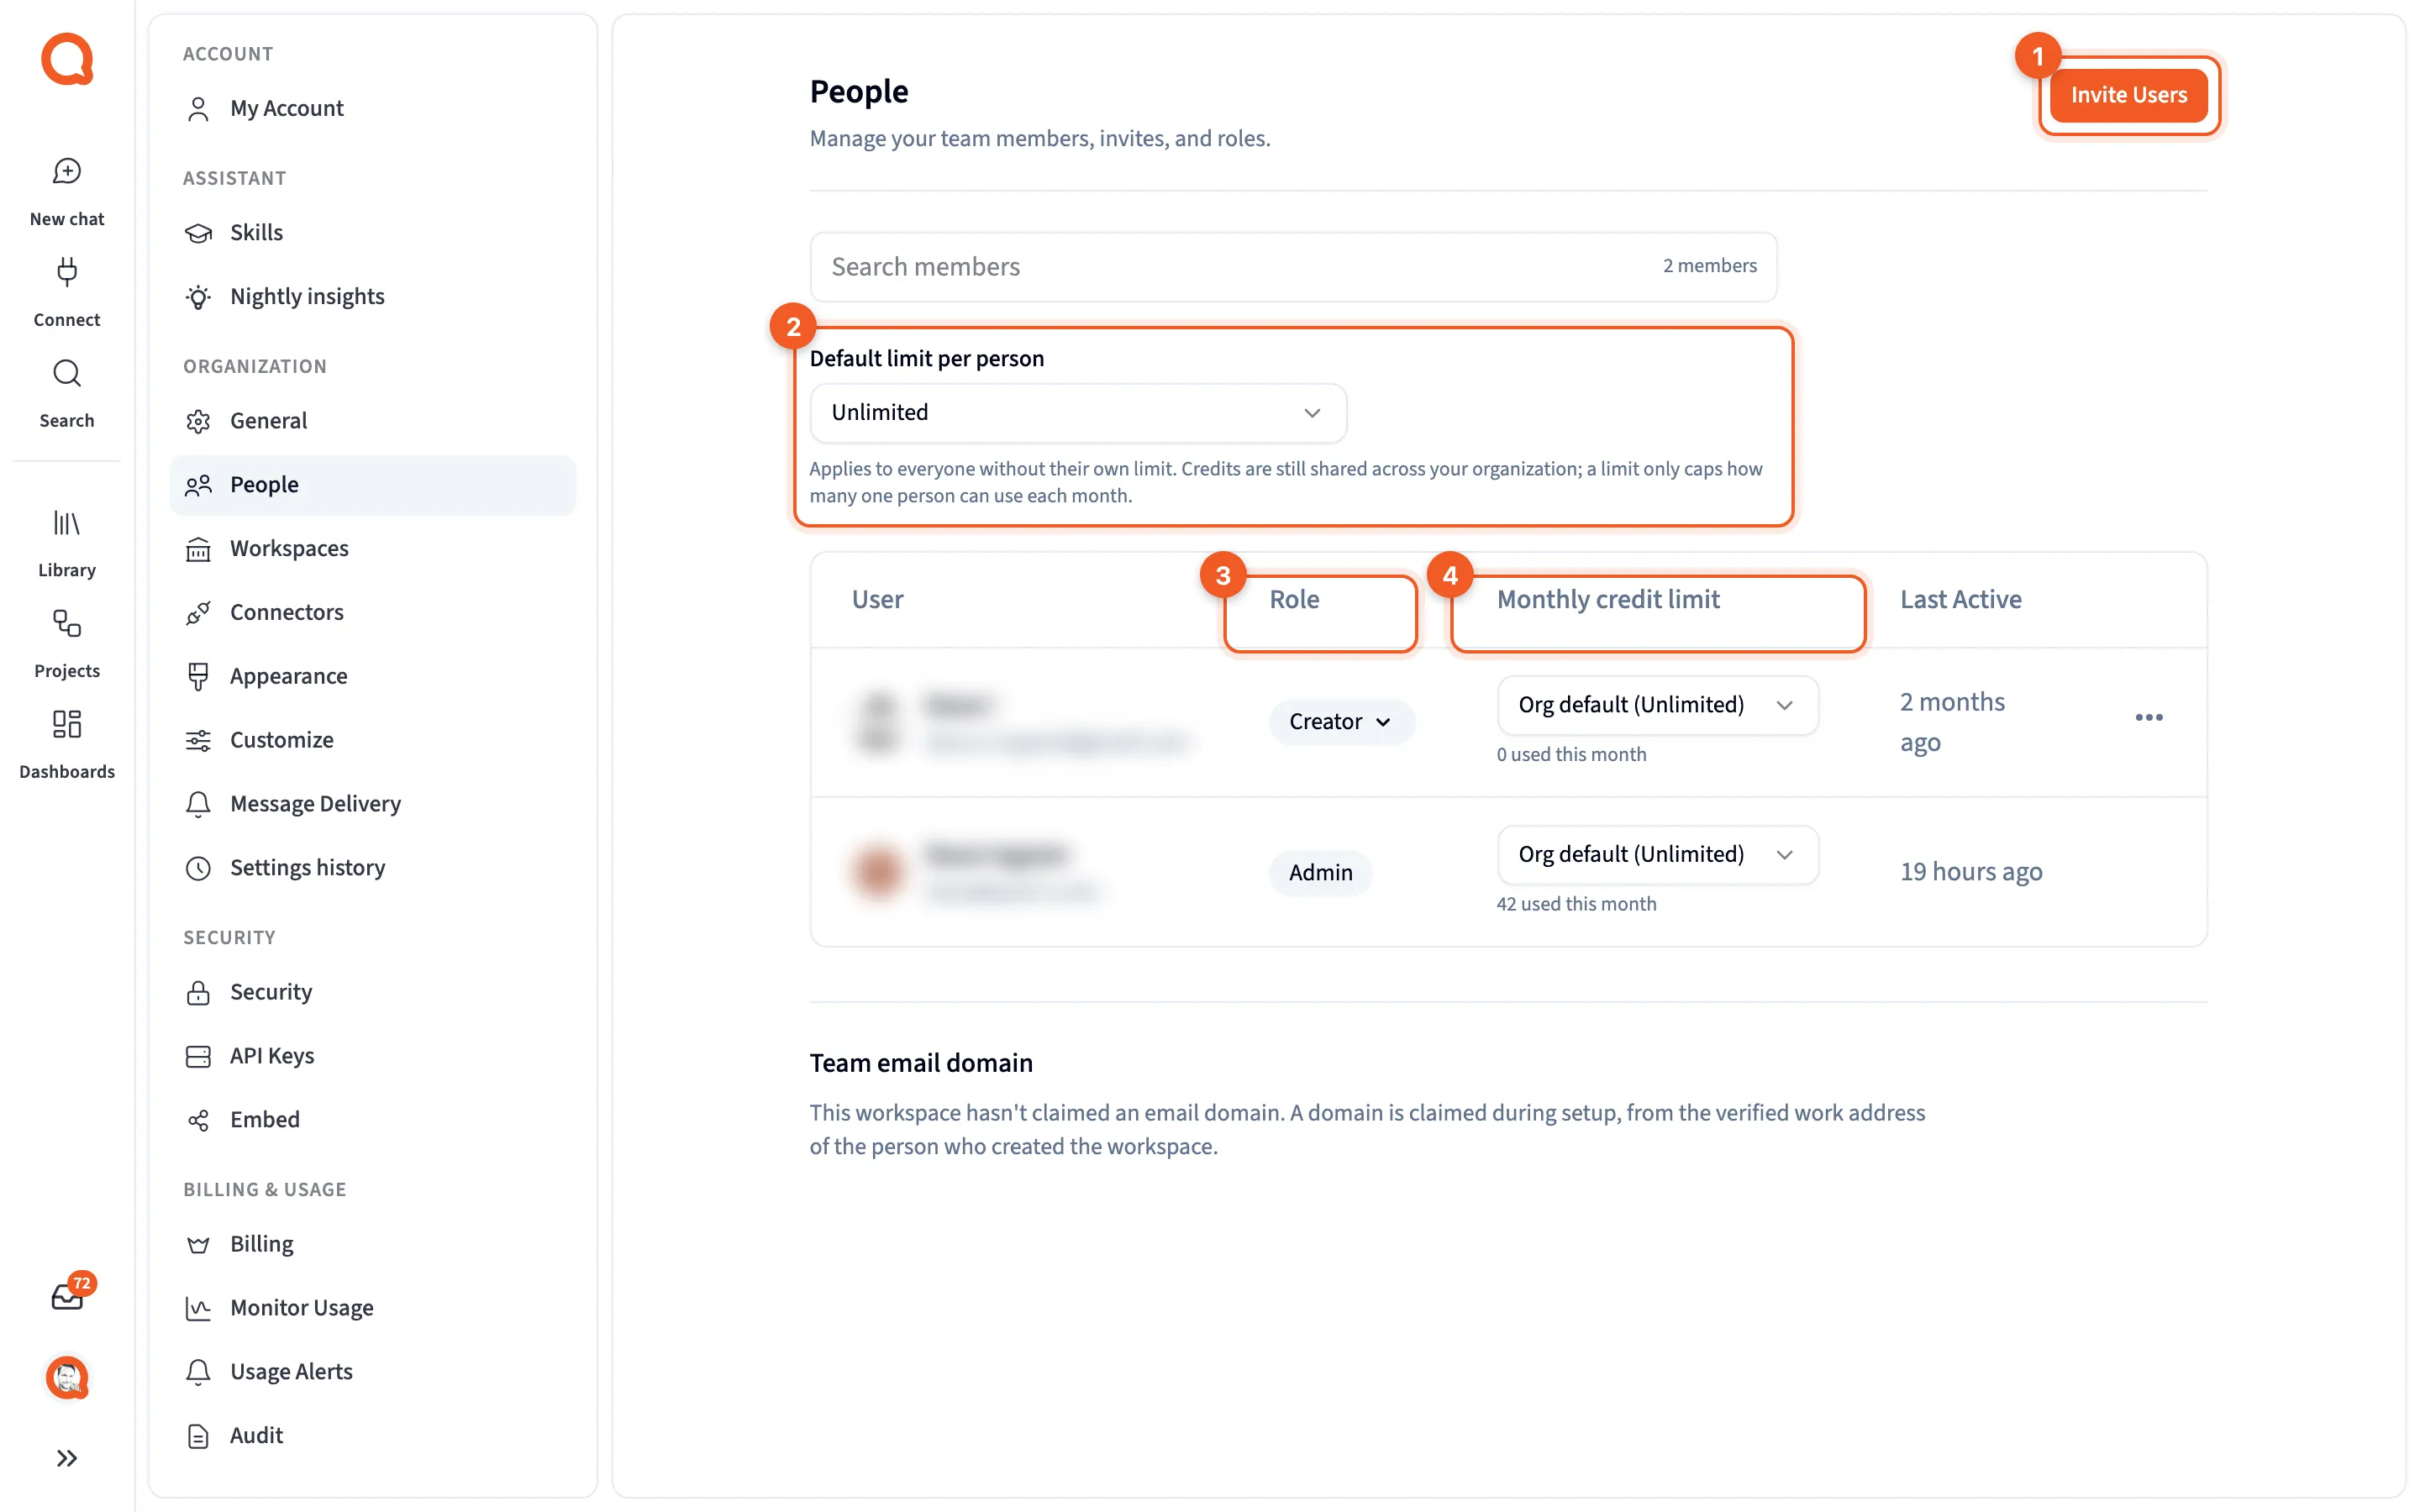
- Invite Users: bring people into the organization.
- Default limit per person: the monthly credit cap for everyone without their own.
- Role: each person’s organization role.
- Monthly credit limit: one person’s cap, and what they’ve used this month.
Most changes here save the moment you make them. Picking a role, a credit limit or a team email domain option takes effect straight away, with no Save button and no confirmation.
Organization roles
Section titled “Organization roles”| Role | What it means |
|---|---|
| Admin | Can open the admin-only pages in Settings, including this one. |
| Creator | Can build and edit. |
| Guest | Can only view. |
New invites start as Guest. Creators and Admins use a seat on your plan, and Guests don’t.
Viewer isn’t an organization role. It’s a role inside a workspace, set on Workspaces.
The members table
Section titled “The members table”Search members filters by name or email, and the count next to it shows how many members there are. In a large organization the list keeps loading in the background until everyone’s in.
| Column | What it shows |
|---|---|
| User | Avatar, name and email. Not Verified means the person hasn’t verified their email address. |
| Role | Your own role, as a plain label. For everyone else, a menu of Guest, Creator and Admin. |
| Monthly credit limit | The person’s cap, with how many credits they’ve used this month. |
| Last Active | When they last used Querri. |
The ⋯ menu on each row has Edit and Remove. You won’t find it on your own row, so another admin has to change your organization role.
Edit opens a dialog with Email (fixed), First Name, Last Name, Role and Monthly credit limit. Click Save Changes. Remove asks “Are you sure you want to remove this user from the organization?” and Confirm Delete removes them.
Invite people
Section titled “Invite people”- Click Invite Users.
- For each person, fill in Email, First name, Last name and Role.
- Click + Add another for another row. Or paste a list of addresses into Email (separated by commas or semicolons, or copied from Outlook) and it splits into one row per person.
- Click Send Invites.
Check the roles before you send. Role starts at Guest, and every row from a pasted list is set to Guest, so change the ones who should be Creators.
A bad address shows “Enter a valid email address”. If only some invites go through, the dialog lists the addresses that failed.
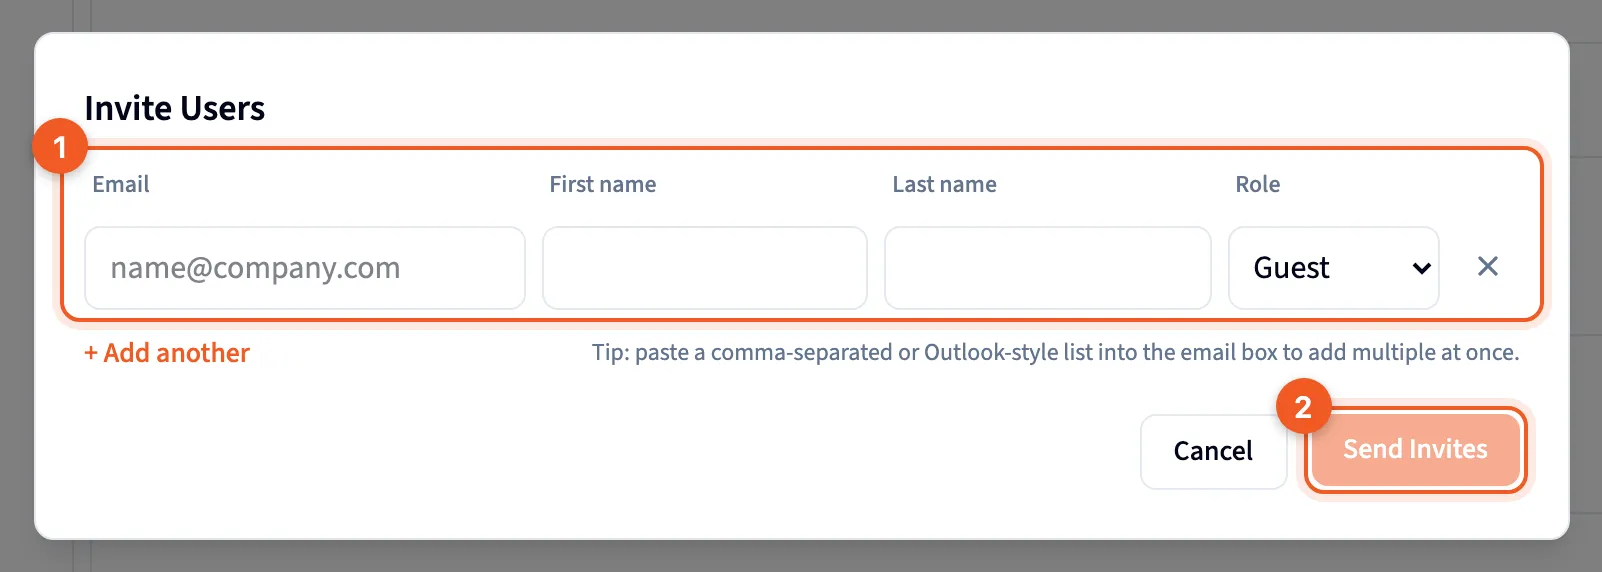
- The invite row: Email, First name, Last name and Role, which starts at Guest.
- Send Invites: send them.
Monthly credit limits
Section titled “Monthly credit limits”In the page’s words: “Credits are still shared across your organization; a limit only caps how many one person can use each month.”
Default limit per person covers everyone who doesn’t have a limit of their own. Choose Unlimited or 5, 10, 25, 50, 100, 250, 500 or 1000 credits.
Each person’s Monthly credit limit can be:
- Org default, which follows the default (the menu shows its current value).
- Unlimited, even when the default has a cap.
- One of the same numbers.
A limit is a hard stop. When someone reaches theirs, nothing more runs for them until their credits reset next month, and they see: “You have used all {limit} of your monthly credits. Your admin can raise your limit, and your credits reset on {date}.”
A person’s limit never stops Nightly insights.
If your provider sets the default, you’ll see “Your provider manages this limit, so it cannot be changed here.” in place of the menu.
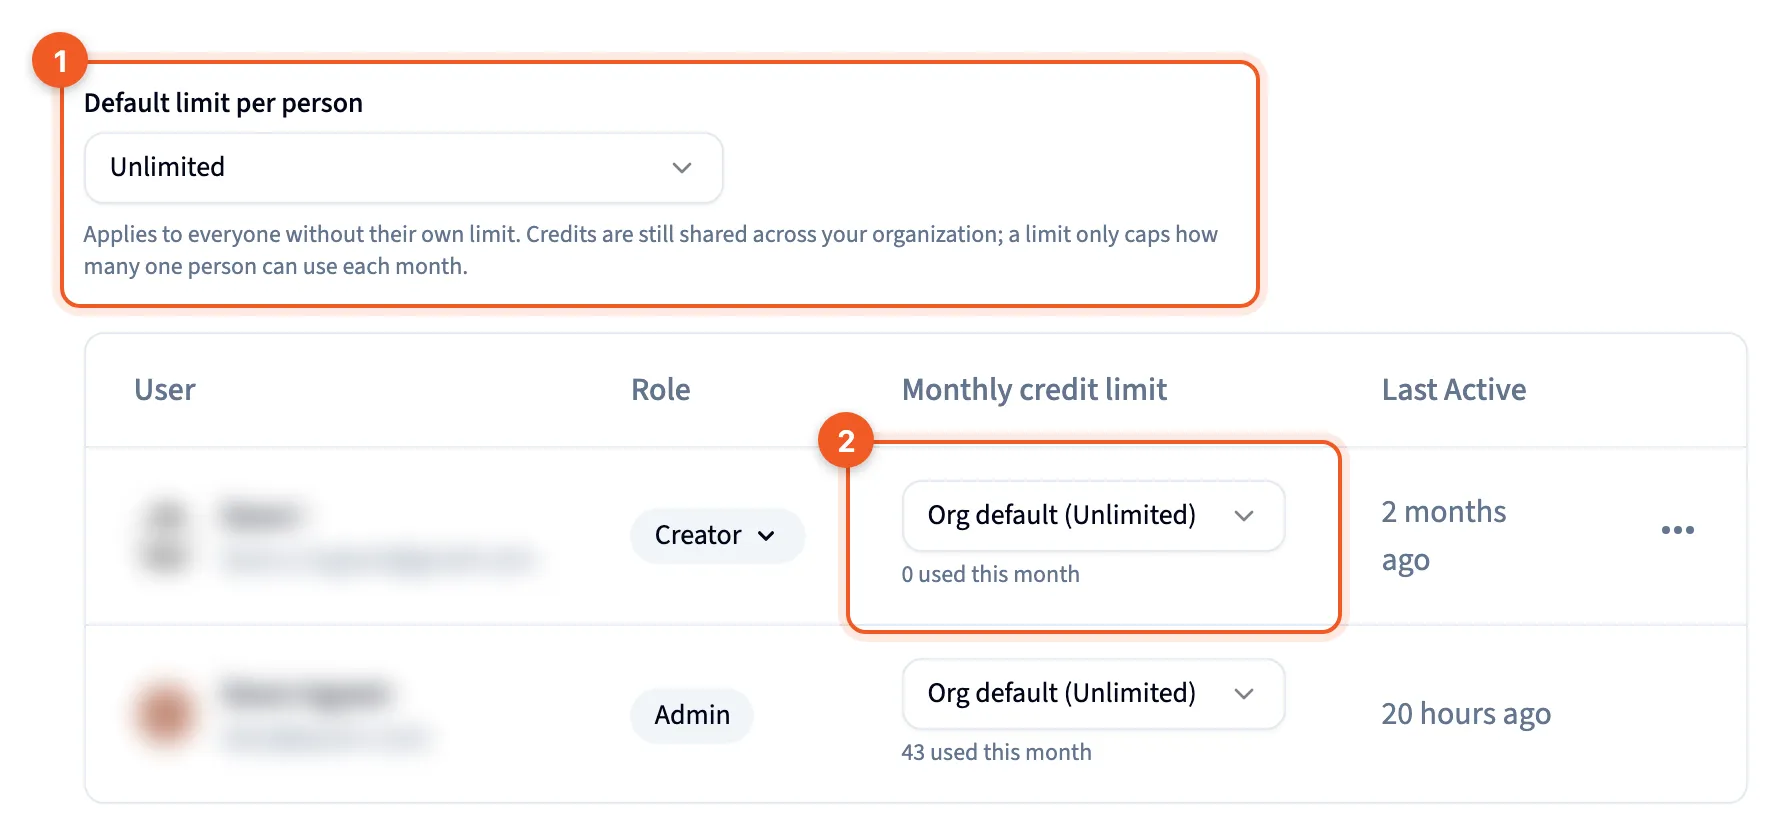
- Default limit per person: the cap for everyone without their own.
- One person’s cap and what they’ve used this month.
See Credits and Monitor usage.
Keep credit use predictable helps you choose the limits.
Team email domain
Section titled “Team email domain”This card decides whether people who sign up with your company’s email domain are offered a place in your organization. Its wording says “workspace”, but it means your whole organization.
A domain is claimed during setup, from the verified work address of the person who created the organization. There’s no button to claim one here. Without one, the card just says no domain has been claimed.
Once a domain is claimed, anyone who signs up with a verified address at that domain is offered your organization when they finish signing up. They choose whether to join it or start their own. The card then shows:
- Offer this workspace to people with a {domain} address, which turns the offer on or off.
- They join as, which is Creator or Guest. Admin isn’t an option.
- Release this domain, which gives the domain up once you confirm.
If joining has been paused automatically, the card says Automatic joining was paused and gives the reason.

- Team email domain, here with no domain claimed, so there’s no offer to switch on.